
Good Evening, my friends!
Only one more work day to go until the weekend! Today I reveal our first DIY post, but first I’d like to wish my best friend, Kristin, a…
Happy Birthday!
Kristin and I have been friends now for 24 years. I honestly consider her the sister I never had. We’ve shared so much laughter together as well as tears (mostly tears from laughing too much). We took dance lessons together, were cheerleaders together, and also roomed together in college. I admire her in so many ways, especially her incredible sewing abilities. She is a wonderful mom to two beautiful daughters and I’m truly blessed to have such a kind soul as one of my bosom friends.
Then:

Now:

Back to the DIY Project
I can’t tell you guys how happy I am to finally show off the wonderful talents of my boyfriend Brett!

There he is eating last night’s dinner. I made Chicken Parmesan using a recipe from my Cooking Light magazine. Instead of using chicken beast, I used chicken tenderloins. I’m thinking it was a winner since Brett cleared his entire plate in less than four minutes. His fast eating skills are not unusual and he frequently blames them on the Marine Corps, particularly during boot camp.

So, let’s dive right into one of his recent projects.
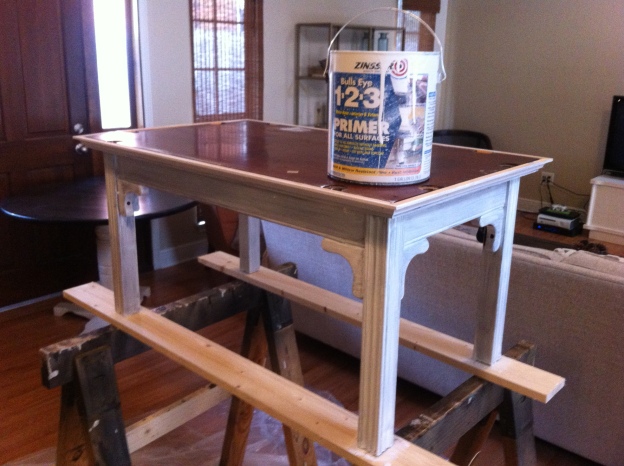
Hello, Brett here. I’m glad to be part of Celina’s new blog. Celina and I share many interests, and although Celina may not do too much wood working, we do enjoy finding, planning, and reviving old pieces that many may see as garbage. No kidding…I’ve found some of my best pieces on side of the road in garbage piles. When it comes to planning projects, Celina is a great inspiration and has wonderful ideas to give old pieces fresh, new looks while maintaining their original character. This particular piece was the first one I had taken pictures of throughout the process (except I did not take a picture in it’s purchased state; first picture is after molding was applied). It’s not a masterpiece, but it was a fun and easy project that any beginner or experienced “Do It Yourselfer” can complete.
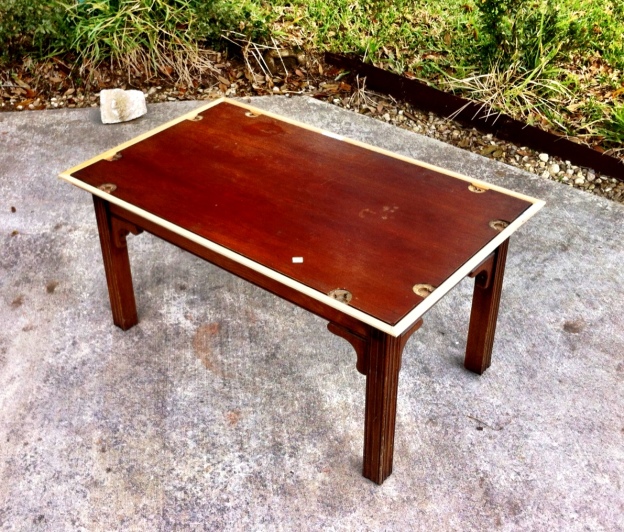
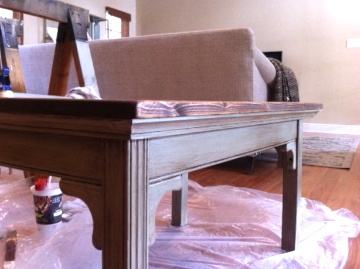
I picked this “butler’s table” from Pinhook Flea Market. The hinges and folding sides they held were missing, but I saw potential in this dusty, forgotten piece. After studying it for a few minutes (as I do all my furniture before purchasing) I saw that this could be a quick and easy flip…a little paint, molding, wood plank top, and some distressing would bring this piece back to life. I purchased it for $20.
I purchased some shoe molding at Lowes, cut 45 degree edges with miter saw, and tacked the molding on with my brad nailer in order to hide where the hinges once laid.

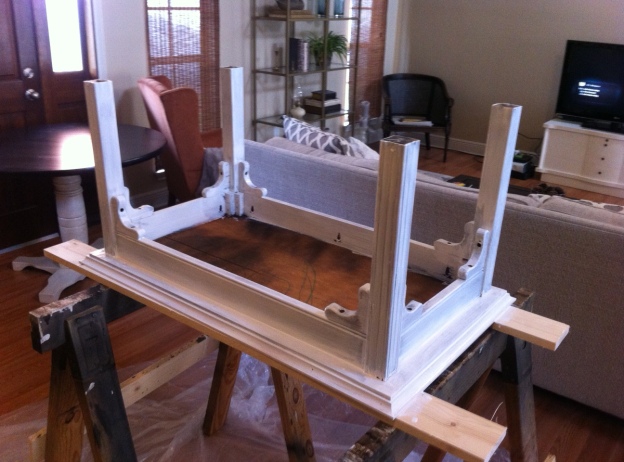
After using the brad nailer to secure the molding, small depressions needed disguising. I use a syringe to suck up the wood filler and inject it into the small holes.
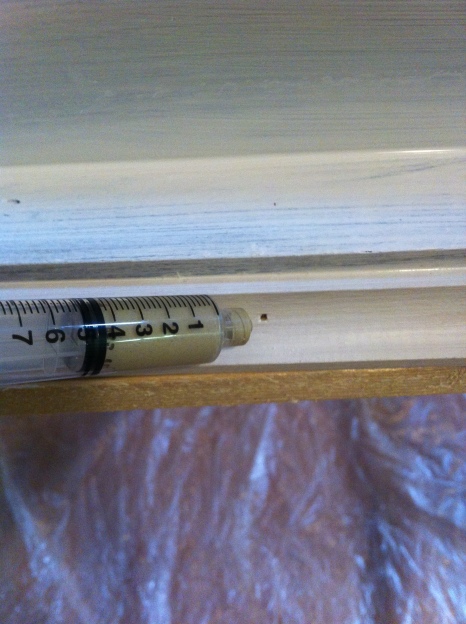
Using the syringe makes this task quick, clean, and easy to do.
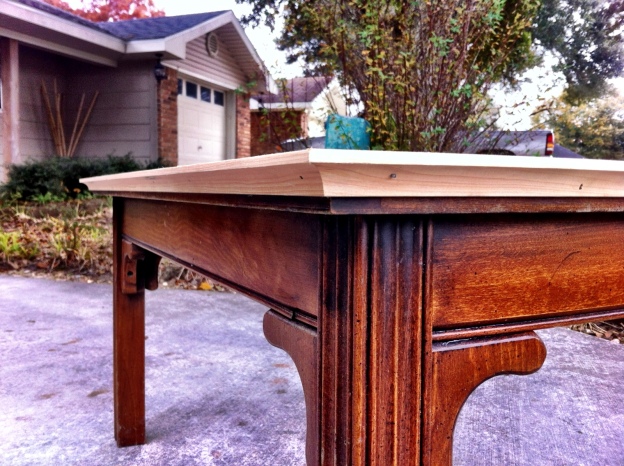
I purchased a 3/4 inch sheet of joined, planked spruce from Lowes. I cut it to size using my table saw and sanded it down to prep it for staining. While the stain was drying, I moved on to priming the legs and frame.
If you are looking to save time and elbow grease, invest in Bulls Eye 1-2-3 primer for painted projects. This allows you to skip stripping and/or sanding and provides a good base for the paint to adhere to.
Don’t be lazy! ATTENTION TO DETAIL! That’s what my Marine Corps drill instructors taught me, OORAH! Paint bottoms and edges of furniture. It gives the piece a uniform look and enhances the appearance and quality of the piece.
As far as paint goes, I use latex paints. Chalk paint is the big craze these days. Personally, I feel it is way too expensive. It is very easy to achieve the same look with the right combination of finishes. A good alternative to chalk paint is to use an eggshell latex paint, apply stained glaze if desired, and apply finishing coats of matte polyurethane. You will save money and still get the “shabby chic” look.
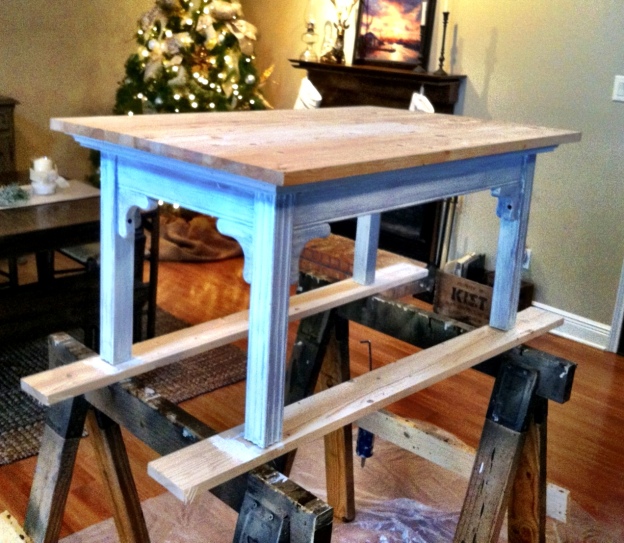
Now it is time to make art out of the furniture. Prepping is the most important phase. Don’t cut corners and ensure you have addressed all issues before moving on to the “finishing phase.” If the project is prepped correctly, the final finish will reflect your efforts.
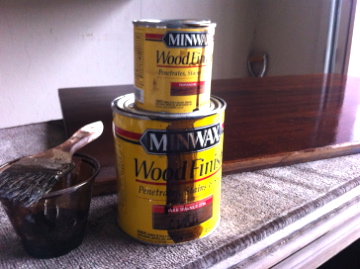
I am a fan of Minwax for my stains and Rustoleum for my polyurethanes. These are just the brands I personally prefer. There’s nothing wrong with trying other brands and finding what works best for you. I also like to mix colors and make blends that are unique to each piece. For this particular project I mixed 1 part Dark Walnut and 1 part Provincial by Minwax.
Next step was to apply a stained glaze which gives the piece a distressed appearance. You don’t need much glaze and even less stain (10 parts glaze to 1 parts stain). Mix the stain into the glaze, and brush it on. Allow a few minutes (3-5 min) to allow glaze to cling. Then wipe gently with a paper towel. Work the stained glaze to where it has a linear, wood grain appearance. The glaze gives you extra time to work the distressed appearance because of its increased drying time. So, take your time with it.
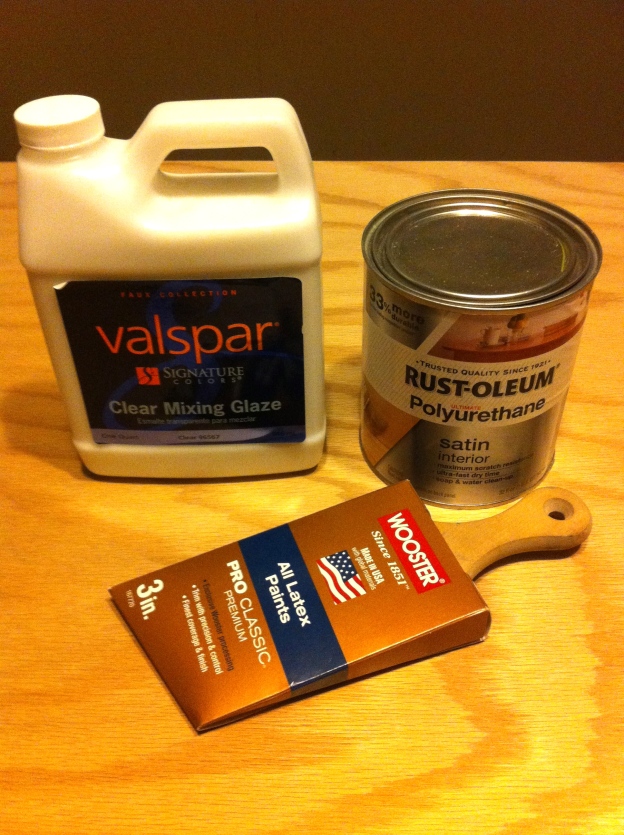
Allow the glaze to dry overnight. The next step is to seal the piece. For indoor furniture, I use Rustoleum’s interior polyurethane. It can be found in many finishes. For this project, I chose “satin.” Apply the polyurethane to all painted and stained surfaces to give the piece a protective and resistant shell. Following the manufacturer’s directions for use will ensure best results. For wooden surfaces, spend the extra money and purchase a quality paint brush. Lower quality brushes leave heavy looking brush strokes in the finish, making the finish unattractive.
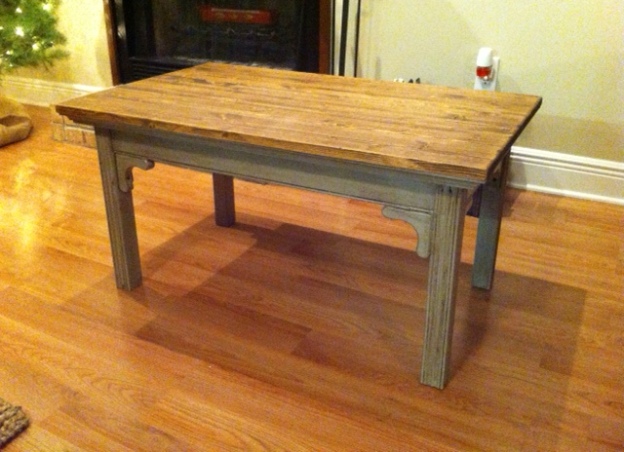
Allow to dry per manufacturer’s directions, and the project is complete! This old, ugly piece that I found hidden under other furniture in a dark forgotten corner turned out beautifully. I recently sold it to a friend to be put in her home, where it will be used and enjoyed for years to come.
Have you ever attempted a DIY project? If so, please leave a comment and let us know how well it went.

Love this, C! You are doing an amazing job on this blog! I’m so honored to be a little part of it as well! 🙂 It’s so easy to read and I completely get your personality through it… great job! Props to Brett as well… I love to see the steps in his DIY projects… great idea of sharing them! May help me out along the way! Love you guys so much. Keep up the great work!
LikeLike
Thank so much for your support! I’m glad it’s easy to read, I was worried about that. See you guys this weekend!
LikeLike
Pingback: Pin It Party | My Cajun Trinity
Pingback: A FriendFULL Weekend! | My Cajun Trinity
Pingback: 100th Post! | My Cajun Trinity
Pingback: ONE YEAR | My Cajun Trinity
I’m going to try this glaze method on a coffee table I’m working on. I wanted the top to have a weathered look, and the grey stain we used looked too much like paint, even after we thinned it don 5 to 1 with thinner. It looks okay, but I think a resand and the glaze might be just what I want!
You made a beautiful table!
LikeLike